· tutorials · 3 min read
Enhancing Test Reliability with Network Stubbing - A Guide
Welcome back to our series on writing automation scripts! Today, we’re diving into an exciting modification of our Best Buy script. The goal? To ensure our tests pass reliably, regardless of the external factors that might affect them.
This blog was generated from a tutorial video you can watch here
Understanding the Problem
In our previous episode, we scripted a simple search operation on the Best Buy website for the term “printer.” However, these searches depend on actual network requests, which can change over time or may not always return consistent results. This can lead to flukes in our test outcomes, ultimately causing frustration and wasted time.
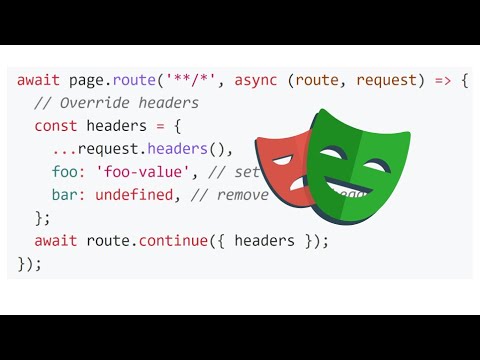
To combat this issue, we can utilize network stubbing. By intercepting network requests, we can control the responses that our tests receive, ensuring a consistent and predictable testing environment.
Setting Up the Environment
First, let’s take a look at how to monitor network requests. If you open the Developer Tools in your browser (commonly with F12), you can navigate to the ‘Network’ tab to observe the requests being made when you input a query.
For this example, typing “printer” triggers an autocomplete API call and returns a list of suggestions. Our task is to override this response.
Implementing Network Stubbing with Automize
We’ll be using Automize for our automation scripting. Here’s how to start:
Select Playwright in Automize: This is where we’ll be configuring our script. We’ll keep the setup simple for now and avoid creating numerous selectors.
Configure the Network Tab: We need to locate the specific query we saw in the network requests. Once identified, we can define a condition to match the start of this request, which gives us flexibility in what we are intercepting.
Force a Custom Response: Instead of allowing the real API response to pass through, we can modify the body of the response. For instance, we can change it from whatever it was to a fixed phrase like “Hello, World”.
Sample Snippet
Here’s a quick look at how our response body might be structured:
// Example for stubbing out the API response
const body = {
  suggestions: ["Hello World", "Wireless Printer", "Laser Printer HP"]
};
// Continue with your script to use this mocked data
Testing Our Modifications
Before fully integrating our changes into the test script, it’s good practice to simulate the request to confirm it behaves as expected. We can run this simulation in Automize and monitor the results.
Once verified, we can take the complete response body and move it into our existing test script, ensuring that whenever we trigger a query, it responds with our controlled output.
// Integration in the test script
await page.type('input[name="search"]', 'anything'); // Type your query
// Now it automatically receives 'Hello World' in response
Conclusion
By employing network stubbing in our automation tests, we gain a significant edge—making our tests much more robust against changes in the live environment. This allows for testing in a stable, known state without the unpredictability of external data.
In summary, this method ensures our tests will pass consistently unless the underlying website undergoes a fundamental breakdown, which is beyond our control. Have fun experimenting and modifying your scripts, and I look forward to seeing you in the next episode!
Happy scri